Learn How To Enable Or Disable An Exchange Online Archiving Mailbox
In this article, you will find how to enable or disable an Exchange Online archiving mailbox in a detailed manner. For the same, different methods are discussed to give a complete understanding along with the most reliable way to export the Office 365 archive.
The popularity of cloud-based services like Office 365 is increasing day by day. Office 365 (Also Known as Exchange Online) is a cloud service by Microsoft that allows you to migrate your mailbox to it. You might be one of the Exchange users who is searching for ways to archive emails in Office 365.
You may also want to disable the archive mailbox option in your Exchange Server. We have solutions for both groups as we will discuss how to enable or disable an Exchange Online archiving mailbox. One method is by using Exchange Admin Center and another one is by using Windows PowerShell. First, gather some basic knowledge about the mailbox archive option in Office 365.
Mailbox Archiving in Office 365
The option to archive the mailbox helps Exchange users to acquire extra storage space. It is also known as ‘In-Place Archiving’. This feature is by default disabled for all Office 365 users. Before enabling archiving, users must remember that the maximum storage limit for ‘Exchange Online Plan 1’ users is 50 GB, while ‘Exchange Online Plan 2 users do not have any such restrictions. Now, learn the methods that will help you enable and disable an Exchange Online archiving mailbox.
Enable Or Disable An Exchange Online Archiving Mailbox Using EAC
‘Exchange Admin Center’ is a management console used to manage the environment of the Exchange Server. Tasks, like migrating mailboxes, monitoring processes, and maintaining public folders of Office 365, are done by EAC. Users can also enable or disable online archive Office 365. Steps for enabling and disabling archived mailbox are shown here.
Enable Online Archive Office 365 Using EAC
- Log in to your Office 365 account. Click on the app launcher icon >> click Admin
- Go to the lower left navigation of Exchange Admin Center and click Admin Centers. Then click Exchange
- Go to the recipient’s option on the left pane and then select mailboxes. Select the mailbox you need to archive. Click Enable option under ‘In-Place Archive’ on the right pane
You can also select multiple mailboxes here. For that, press the Shift and CTRL keys. After selecting, click More options in the details pane. Then click the Enable option under ‘Archive’ to enable online archive Office 365.
Disable Mailbox Archive Using EAC
- Sign in to O365. Click Admin
Go to EAC lower left navigation. Click Exchange Centers>> Exchange
- In the current window, select recipients >> mailboxes. Select the mailbox you wish to disable. In the details pane, click Disable under the option ‘In-Place Archive’
Enable Or Disable An Exchange Online Archiving Mailbox Via Windows PowerShell
Microsoft developed PowerShell to execute lengthy administrative tasks easily. PowerShell can be compared to Command Prompt, but it is more effective than Command Prompt. Windows PowerShell can combine multiple commands and simplify repetitive tasks. The task of enabling and disabling Mailbox Archive can also be done with its aid. If you want to know how to allow online archive Office 365 using PowerShell, here are the steps:
Enable Online Archive Office 365 Using PowerShell
- To proceed with this method, connect Office 365 using PowerShell
- Run this command now: Enable-Mailbox -Identity “Mike Jordan” –Archive
This command has enabled archiving for Mike Jordan’s mailbox. In the case of archiving all mailboxes connected to this Exchange Server. Run the following command to enable online archive Office 365.
Get-Mailbox -Filter {ArchiveStatus -Eq “None” -AND RecipientTypeDetails -eq “UserMailbox”} | Enable-Mailbox –Archive
Disable Mailbox Archive Using PowerShell
- Use Windows PowerShell to connect Exchange Server and run this command: Disable-Mailbox -Identity “Mike Jordan” -Archive
Also Read: How to Import PST File in Outlook Web efficiently?
Most Reliable Solution to Export Archive Mailbox to Outlook Data File
Above we learned how to enable Or disable an Exchange Online archiving mailbox. But, most of the users may want to export their archive mailbox to Outlook. For the same, one of the widely used approaches to export the archive mailbox into PST files is Office 365 Archive Export Software. This is the error-free and most reliable software to export Exchange Archive mailboxes. You do not need to enable online archive Office 365. You can also monitor the complete process with the help of the report generated after the process.
Step-By-Step Procedure to Perform Exporting
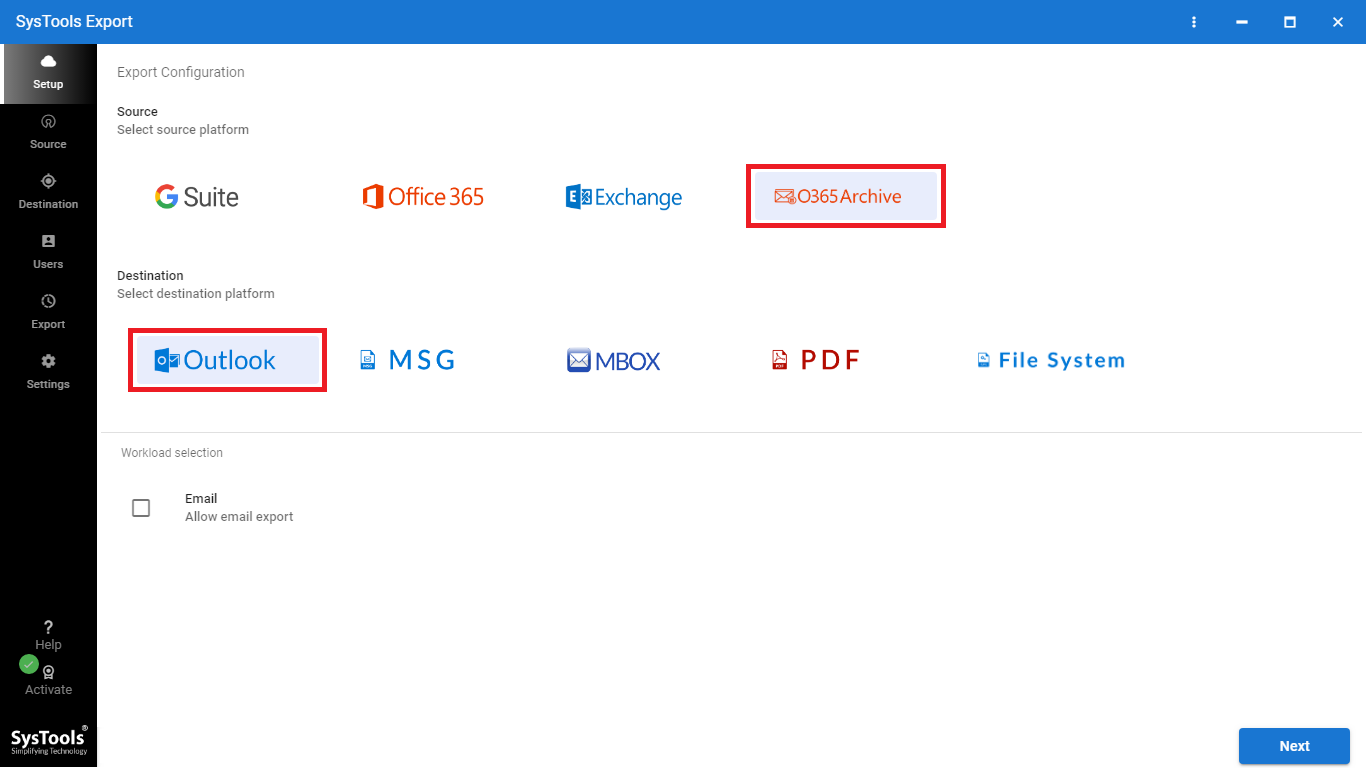
1. Download and Run the tool. Select Office 365 Archive as the source and Outlook as the destination.
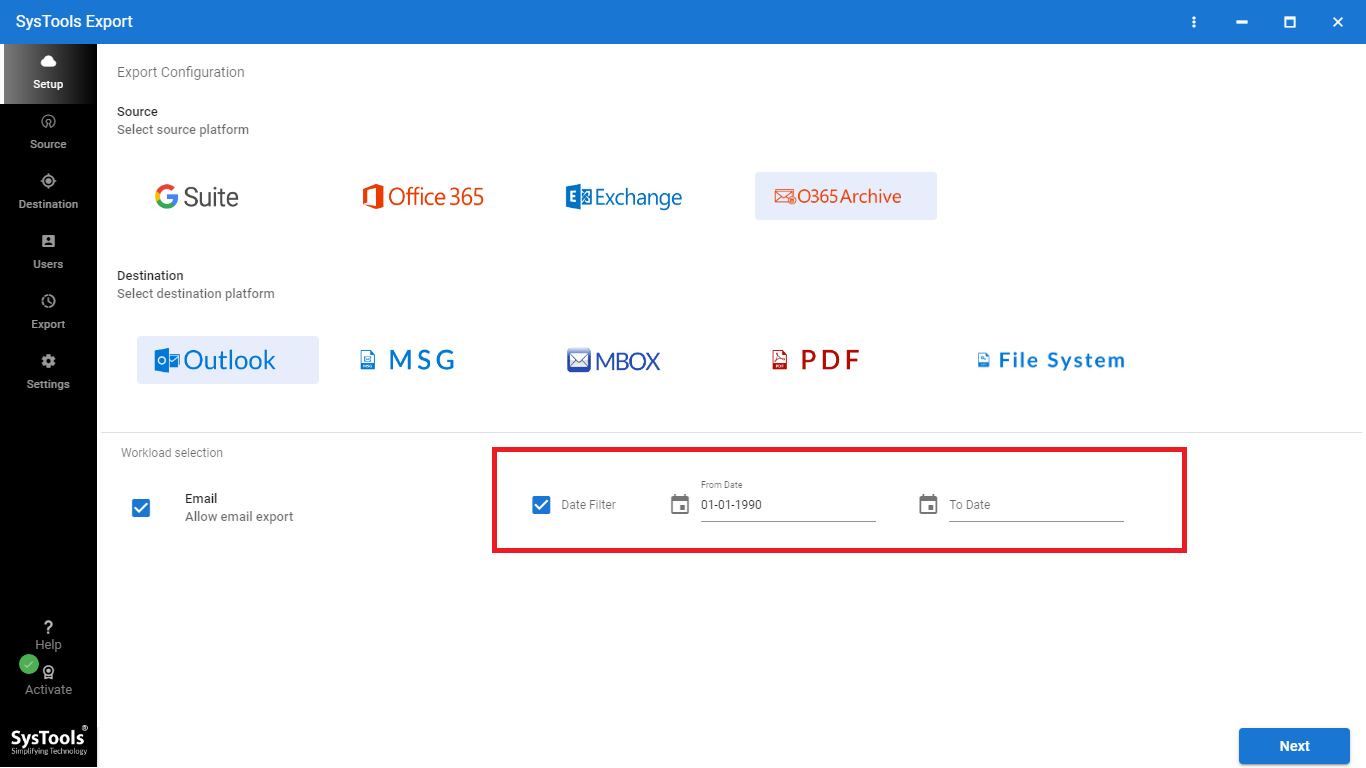
2. Select the essential data under the workload and apply the Date Filter.
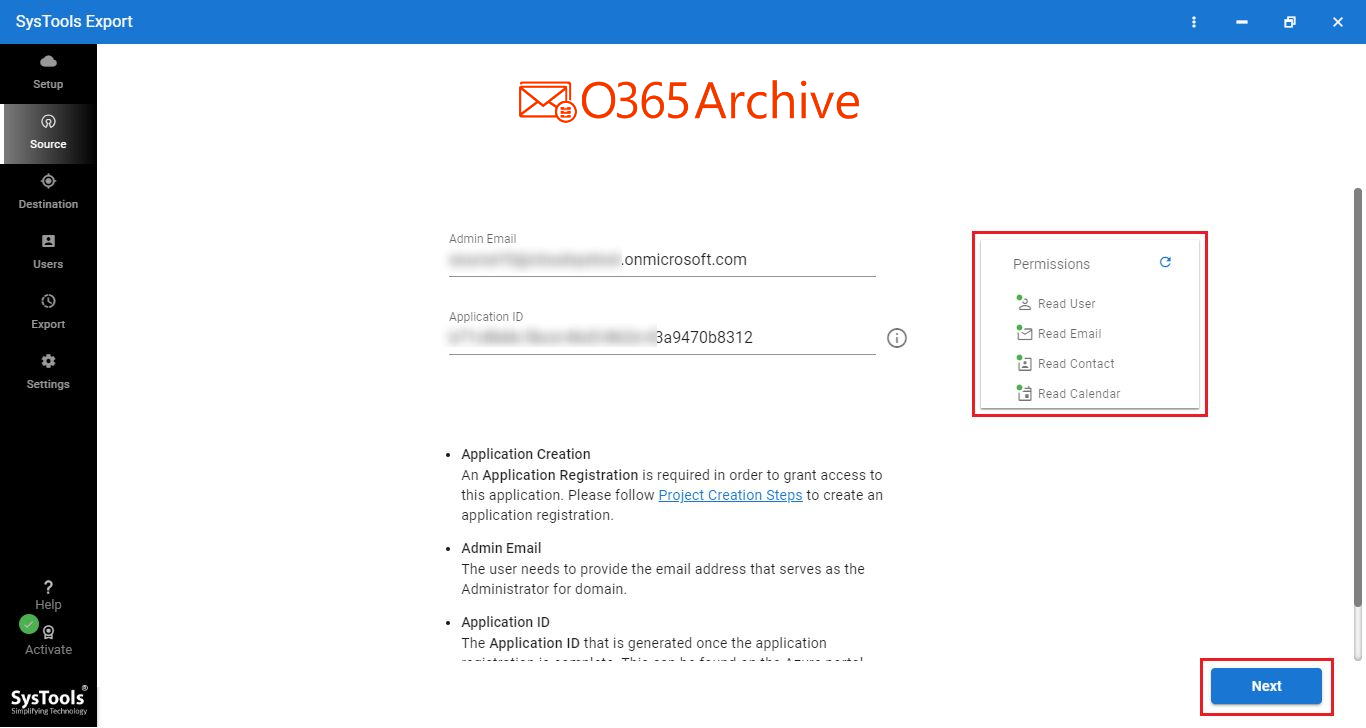
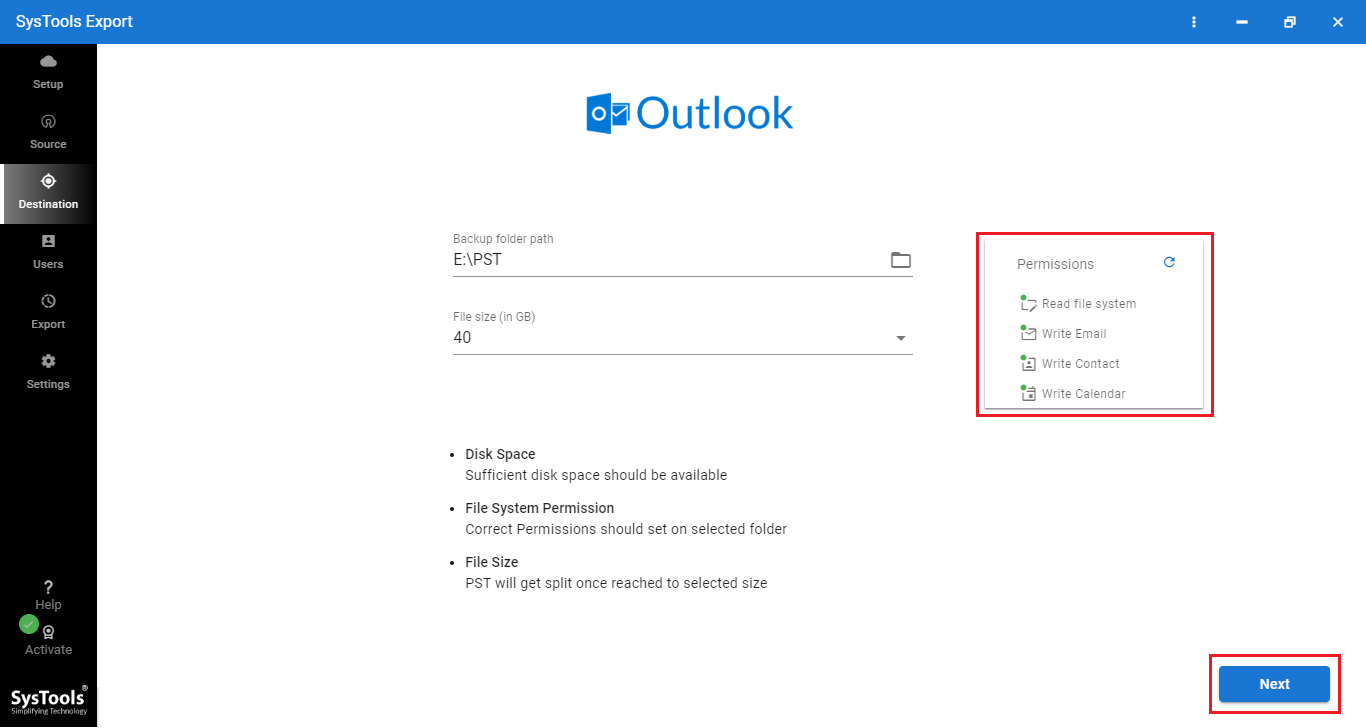
3. Enter the source credentials then validate and hit Next.
4. Enter the destination credentials validate and move to Next.
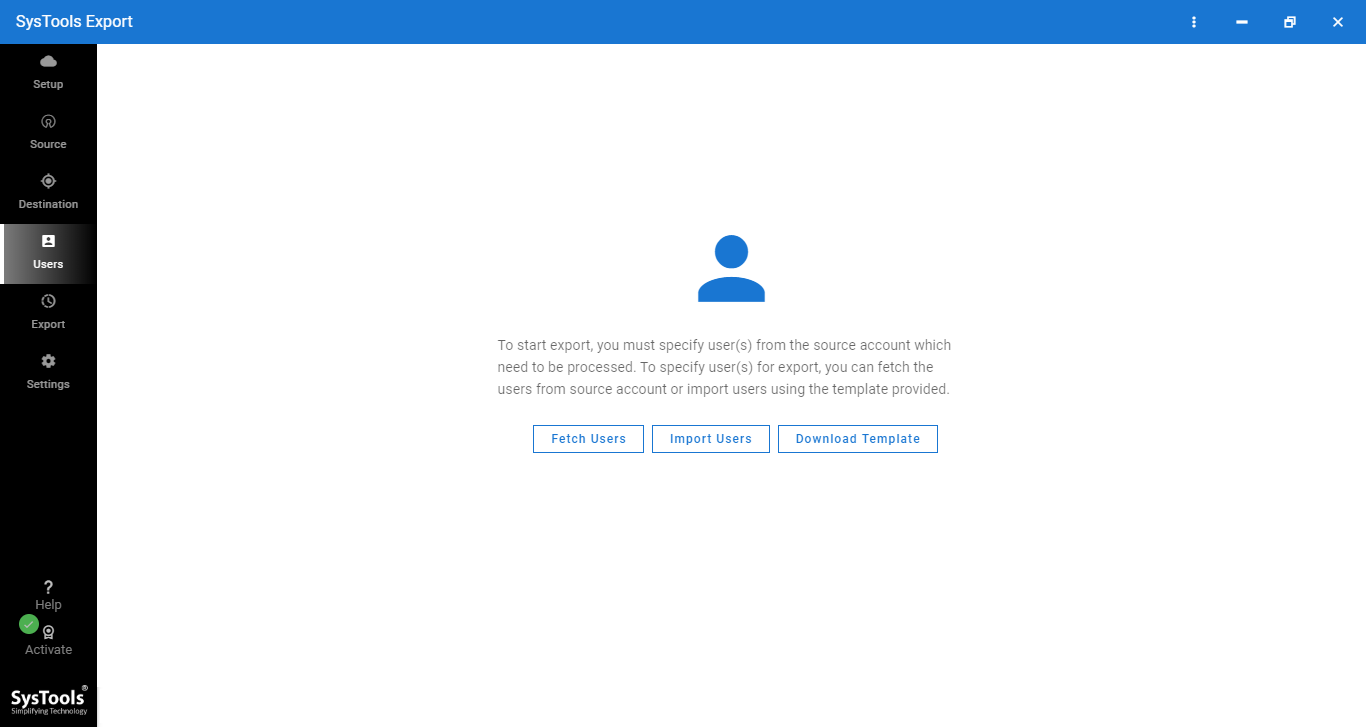
5. Load the users using the Fetch Users, Import Users, or Download Templates option.
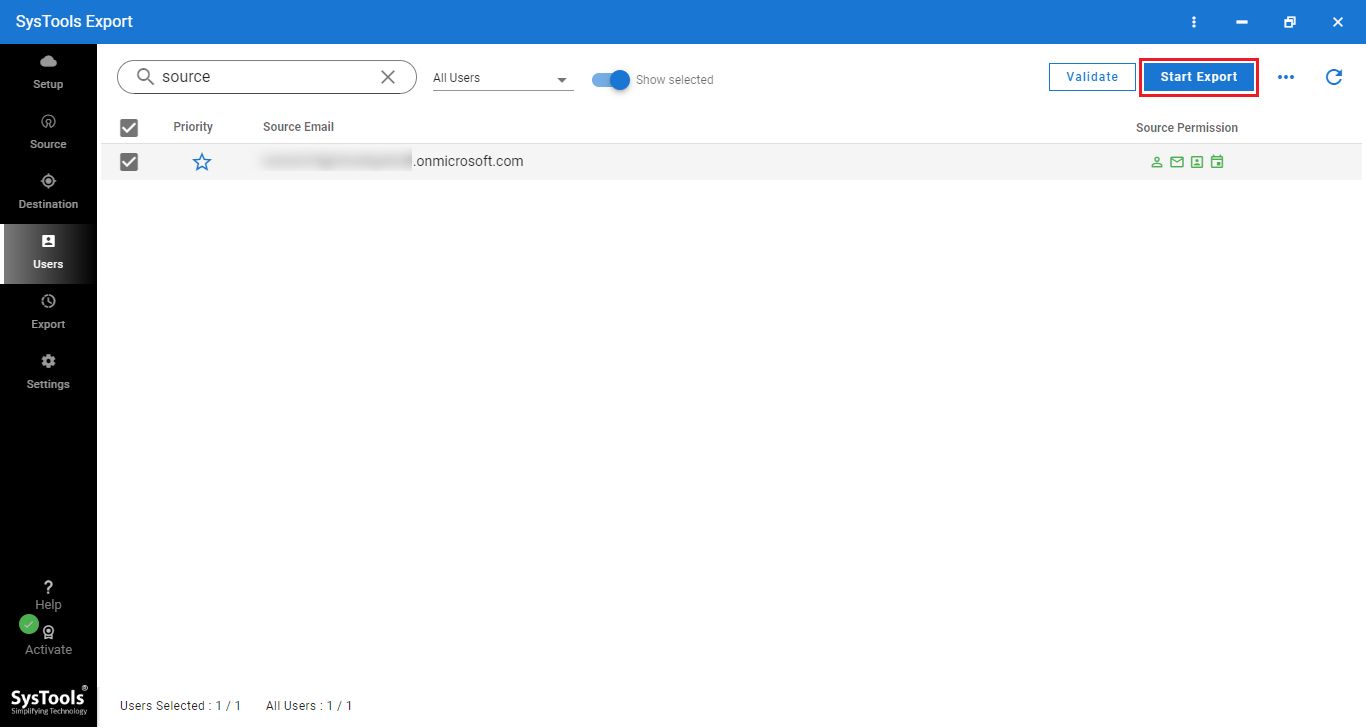
6. In the end, click on the start export button to start the process.
So There You Have it
After reading these techniques, users will be able to enable or disable an Exchange Online archiving mailbox. Exchange users worldwide apply these techniques mentioned above to on/off their mailbox archiving option in Office 365. Sometimes, users have PST files in their system, which they also want to archive in Office 365. Office 365 Restore is a useful software for them. Users should go to the Exchange Online Restore tool.


