Google Vault Email Export to PST File – An Introduction
The importance of Google Vault is not hidden from any of us. Indeed, it is one of the finest data retention tools from Google. However, when users need to execute the Google Vault email export to PST or any other format, they get a reality check. The task of downloading the Google Vault data isn’t simple at all. It may look easy, but it has several hurdles.
This guide has answers to all the questions of troubled users, along with a decent & reliable solution for them. If you want to export Google Vault emails to PST file format, then simply follow this guide from beginning to end. There will be no questions left behind in users’ minds after reading this entire solution for exporting the files of Google Vault into their desired PST or MBOX file format.
Why Google Vault Export to PST is Crucial for Users?
Before we move forward, let’s quickly have a look at the reasons why users need to export these files in PST or any other file format. It can help us get detailed user intent to focus on their needs.
Data Requirement Locally
One case is when a user mistakenly deletes a crucial file. In such blenders, users often want their data files back locally as soon as possible. Therefore, they execute Google Vault email export tasks. Later on, they might use that data locally or export it somewhere else. That’s totally their preference.
Data Requirement in Outlook Email Client
There are some organizations that hire other companies to manage their data, build reports, analyzing threats & opportunities. In such cases, if they have to provide this data to the respective party, they need to first export it to the Outlook email client. Outlook is used professionally all over the world & thus, the majority of users need data in PST format.
Also Read: Solve Google Vault Export Stuck at 95 Issues
Steps to Manually Export Email Data from Google Vault
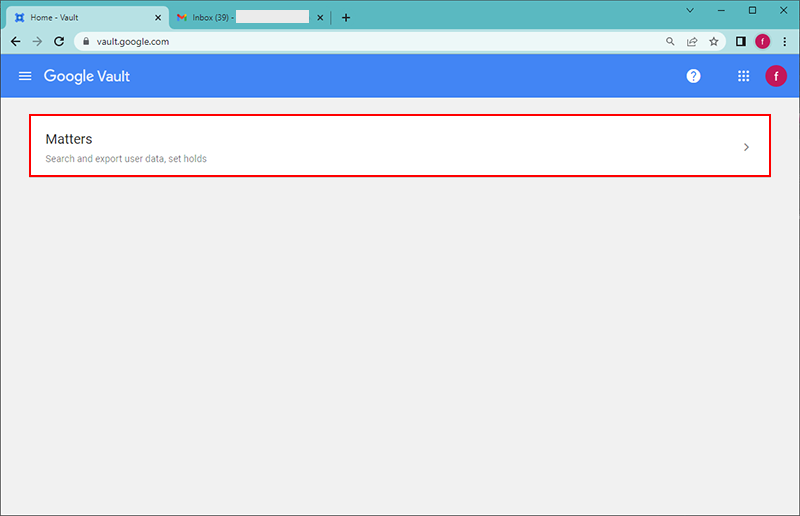
Step 1. Start by signing in to vault.google.com and click on the “Matters” tab.
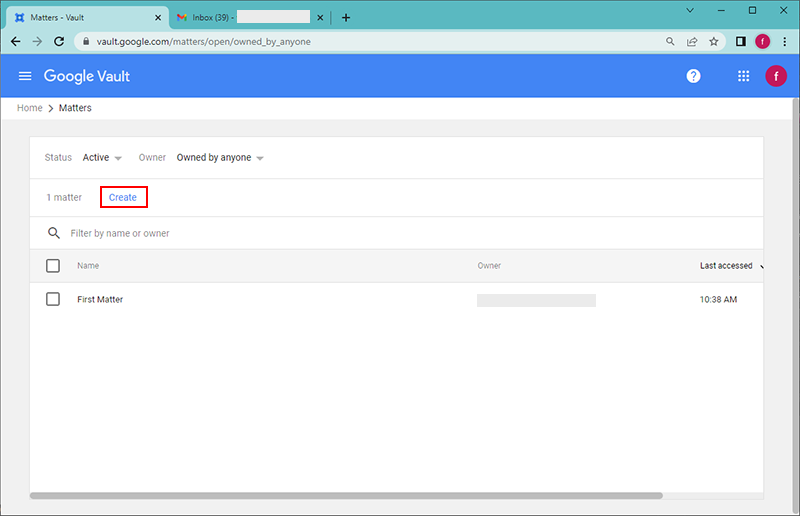
Step 2. Press the “Create” option which makes a dialog box appear on your screen.
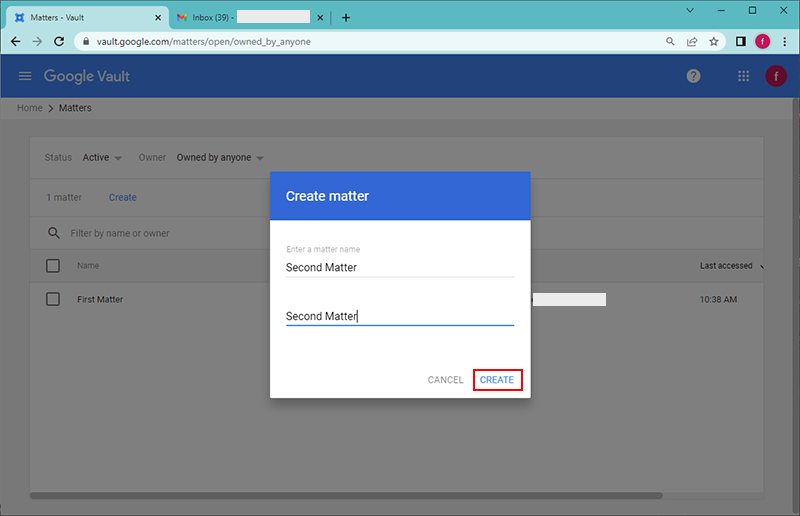
Step 3. Inside that box type a new name as per the recommendations & hit “CREATE”.
Step 4. Choose the Gmail Service if you want Google Vault email export to PST directly.
(Note: Only a single service can be selected at a time. So if you want to download items from multiple options create another Export Matter.)
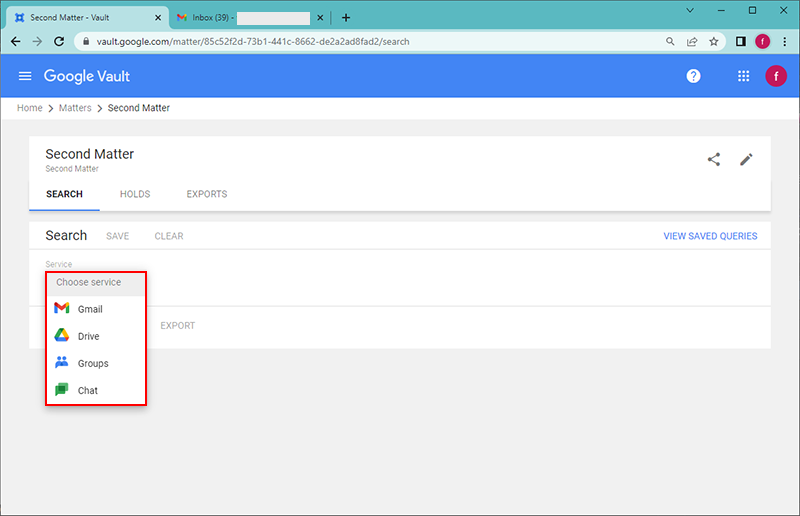
Step 5. Pick a data source the options include
- All data: for complete item set.
- Held data: for data inside legal holds.
- Unprocessed data: for exporting recent data not yet processed.
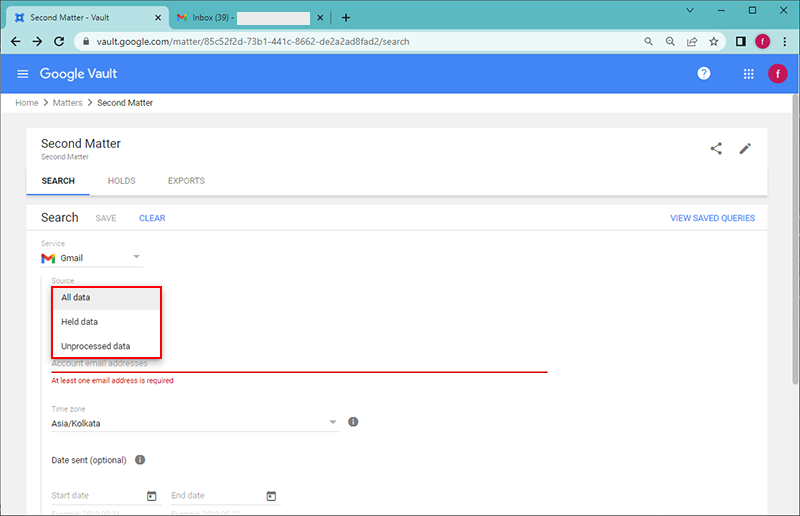
Step 6. Make an entity selection from the available options (All accounts, Specific accounts, Organization unit).
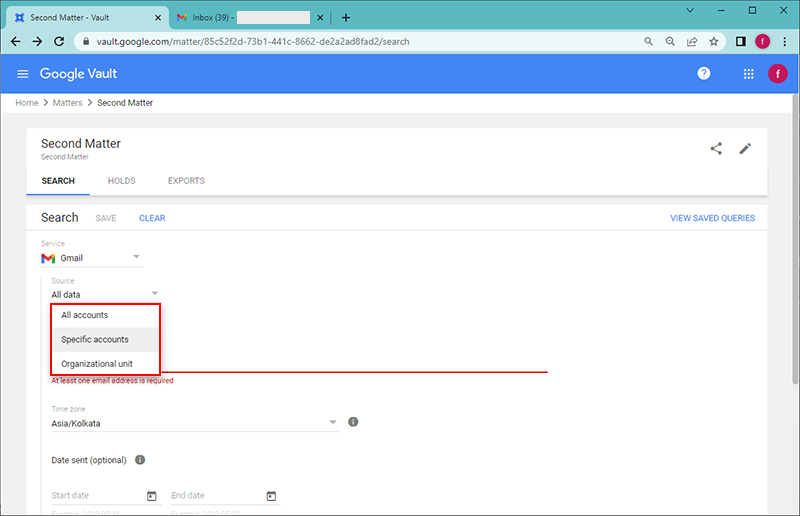
Step 7. Fill the rest of the tabs with the relevant account details.
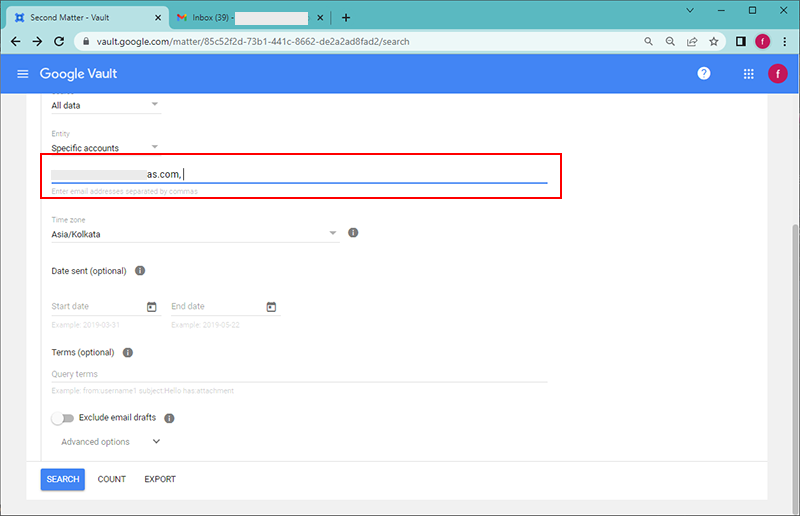
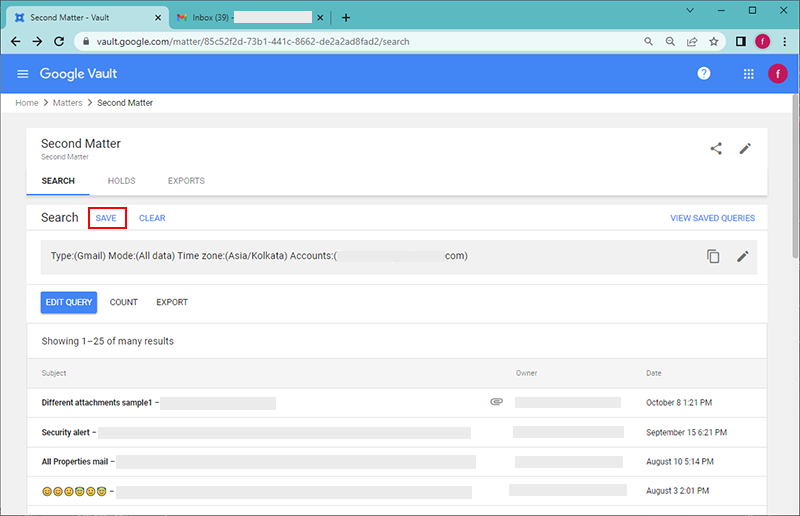
Step 8. Once done, click on the SAVE icon present at the top side of your screen.
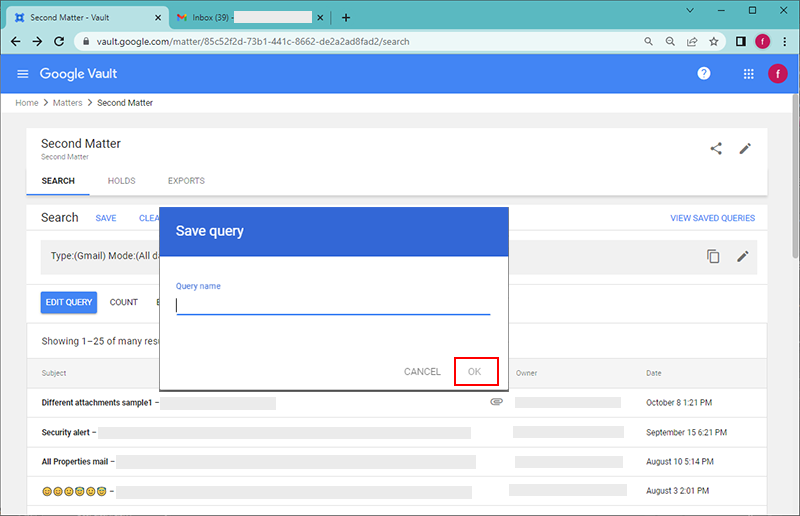
Step 9. Type in a Query name and press OK.
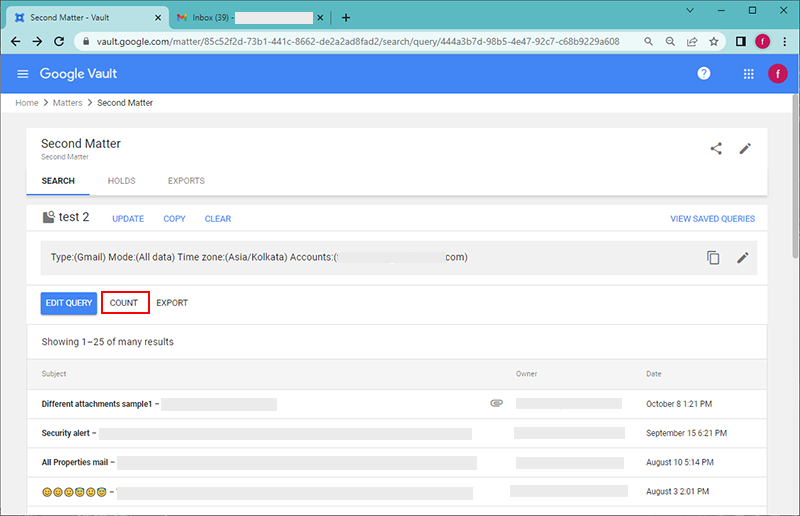
Step 10. Go to the COUNT section to check the number of items that are to be downloaded.
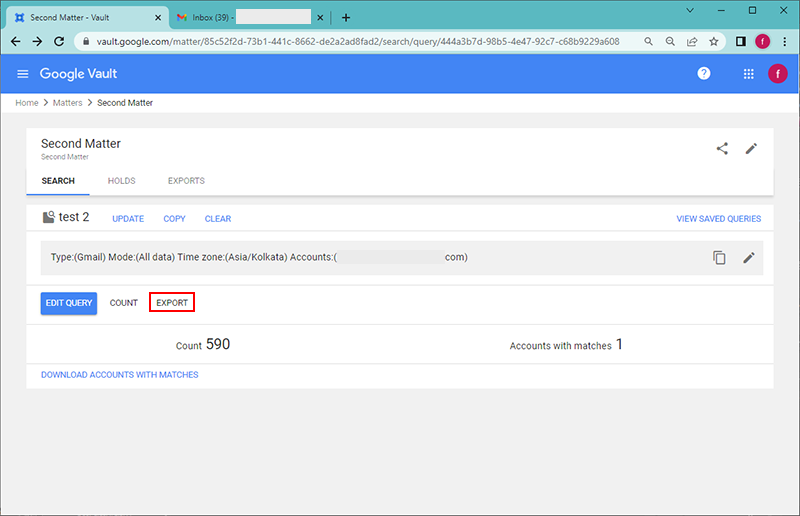
Step 11. Click on the EXPORT tab.
Step 12. Type the name for the Google Vault Export file.
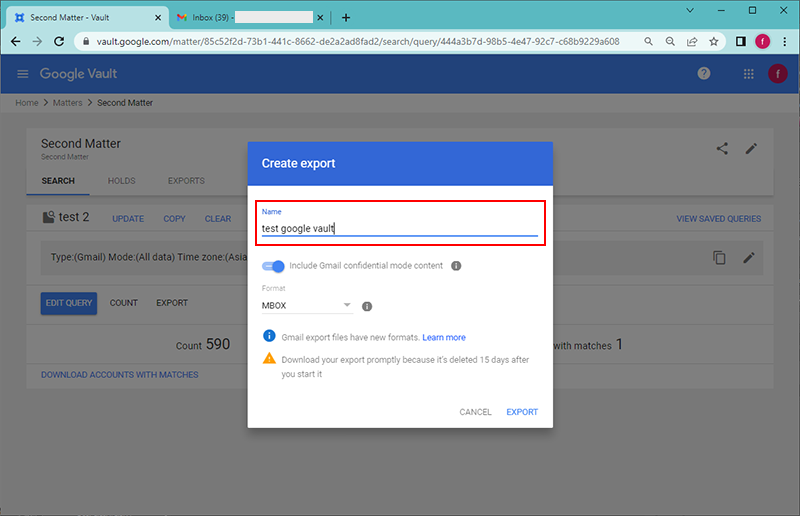
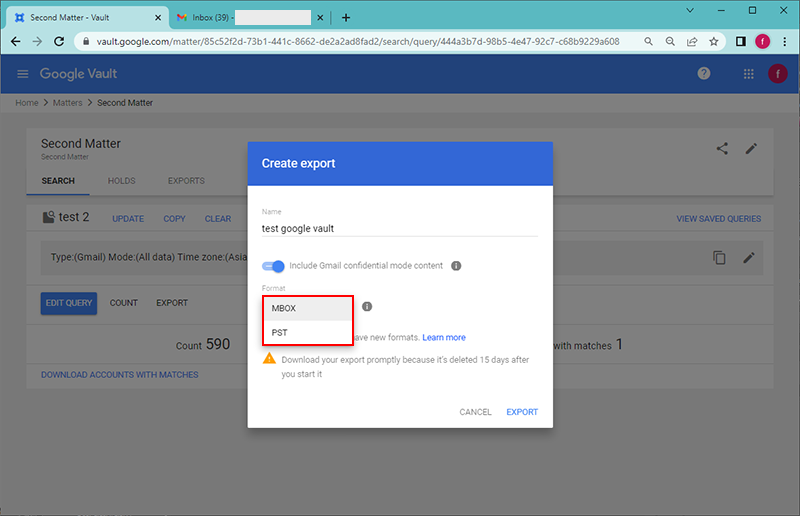
Step 13. Pick the file type from either PST or MBOX and press the EXPORT button.
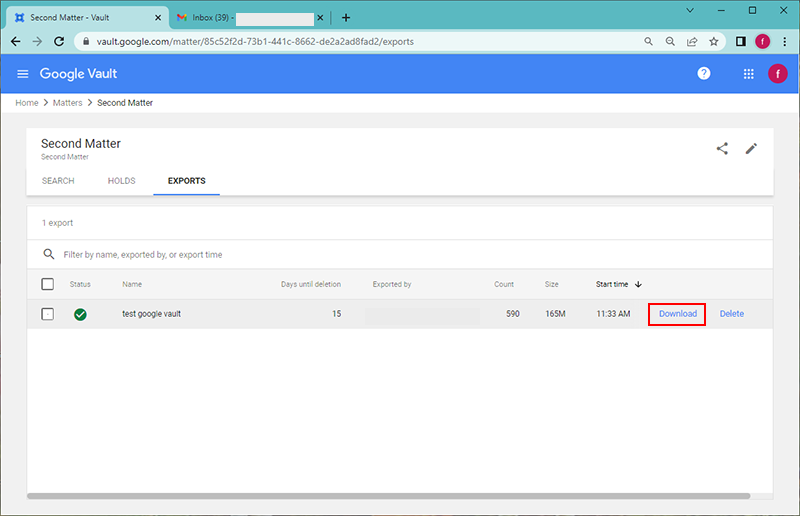
Step 14. When the Export is ready, Download it to get the relevant content.
Drawbacks of Manual Google Vault Email Export Task
We often get questions from users about the solution that Google provides manually. Now, the users that already tried that method, know the drawbacks. However, users who haven’t tried the manual method, are still unaware of the critical disadvantages present there.
No Bulk Export Task:
If users want to run more than 20 export tasks simultaneously, it’s not at all possible. This is a critical limitation from the point of view of large-sized enterprises. This not only exploits the user experience but also creates a time delay if the users have a deadline. Users who want to execute the Google Vault export to PST task, mail us asking for a solution to this problem.
Naming Convention Restriction:
While creating a new export, make sure that it has a unique name. That means don’t reuse an old export, even if it has been completed. Although the names of deleted exports may be used, we don’t recommend doing so. Another thing to keep in mind is that the use of special characters (~!$'(),;@:/?) inside the export name is forbidden. So to make the names unique, use numbers instead.
File Size Limitation:
Google Vault offers users two file formats in which they can export their data files. One is the PST, & the other is the MBOX. However, unfortunately, there is a size limit on it. In the case of PST, only 1 GB of data can be stored, & it creates a new file after that. On the other hand, for MBOX files, the limit is up to 20 GB.
No Preview of Files:
There is no option to preview the files as well. If users want to get a file, they need to search for it by its name in the Vault. If users just want to look at all the files in Google Vault & download them as per their choice, it’s not possible here.
No Advance Features:
There are no advanced features for Google Vault email export to PST in the manual method so far. Therefore, we can say that users often face issues.
Google Vault Email Export Step-by-Step Solution
It’s time to be aware of the most advanced as well as the most in-demand solution. Now that the manual solution is full of drawbacks, users must change their strategy. Instead of focusing on the automated solution, they can simply download the most reliable Google Vault Downloader Tool to continue. This is an automated method that offers users customized options to get the solution,
Download the software & then follow the below steps carefully for Google Vault to export to PST format :
Step-1. Install the Tool, Launch It & Activate the License first.

Step-2. Set the Destination file format as PST or the MBOX file.

Step-3. Select Workload like Emails/Documents to continue.

Step-4. Validate by after Entering the Credentials of your Google Workspace Admin account.

Step-5. Finally after mapping, Select Users from the preview screen & Click on the Start Download button.

Half Way There & Stuck – Here’s the Solution
We have heard of cases, where users already used the manual method for Google Vault email export to Outlook PST. However, due to mistakes, they got the files in a different file format. This happens most often with users who accidentally download the Google Vault files in MBOX format.
They need to get the files in PST files, but how? So, instead of conducting the entire export task again, which is slow as well as inefficient, users just need a converter tool. This is the only way to save time & get the safest results for amending their Google Vault export to PST task.
Yes, the simple method to convert MBOX to PST is by using an advanced solution or simple manual tricks. This is so far the best way for users to export Google Vault emails to PST format if they have files in MBOX format.
The Final Say
Yes, this task isn’t as tough as users think of it. The only catch here is awareness of the right tool & technique. Without being technically users, users might end up in difficult situations. However, the Google Vault email export task isn’t that tough with the automated tool mentioned above. In addition, the converter tool also plays a crucial role for troubled users who already have files in a different file format.
A little attention of yours can save you from a lot of hassles, for sure, without any issues. The Google Vault email export to PST task is easy with the perfect solution like the one mentioned above, as it’s the first choice of IT experts as well. The advanced technology makes it even, more robust.

